Card Making Basics: Adding Color - Watercolor Pencils
- Aug 4, 2021
- 2 min read
Watercolor pencils allow you to create the soft look of a watercolor painting without having to worry about the colors getting muddy or the mess of mixing paints. You can more easily adjust the amount and placement of color with watercolor pencils.
1. Stamp your image using pigment ink and let dry.

2. Add color to your paper by rubbing the pencil across the paper. The more you press the watercolor pencil, the more pigment that is deposited, and the more vibrant the colors will be in the end. Start with your shadows.


3. Lightly dampen the pigment from the watercolor pencils by using a wet paintbrush and moving and blending the colors to fill in the rest of your image.


4. Let the colors dry completely.
5. Continue to add color to darken areas as needed. Also consider adding color by putting the paintbrush to the tip of the watercolor pencil to get more intense color.
6. Be sure to wipe off your paint brush in between colors so as to not mix the colors or create a muddy look.

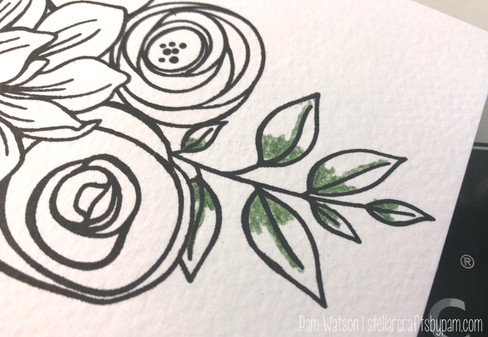
For my card, I chose a floral image to color. Now, I’m not the best water colorer, so please don’t judge your idea of watercolor pencils on my abilities (or lack thereof)! I began by stamping the image in pigment ink. Don’t use dye ink as it’s water-based and will just smear when you add water, and we don’t want that. After stamping my image, I began with the middle flower by adding color with the watercolor pencil where I’d imagine shading would be on the flower. I then dipped my paintbrush into clean water and went over the color on the flower to activate the watercolor and drag the color out to fill the rest of the flower. For more vibrancy, I took the paintbrush to the tip of the watercolor pencil to get more pigment on the paintbrush and applied that to my shadows, and then washed off my brush to blend the color our. I continued this for the rest of the flowers and the leaves. I then cut down my image to 4”x5.25”. I splattered my image with some black paint for an added detail. I then stamped the sentiment “Sending hugs” with the same pigment ink. Lastly, I finished off the card with some clear sequins and a black mat around the image. If I were to make a suggestion for improvement, it would be to restamp the floral image after watercoloring it with the pencils just to make sure the lines of the image don’t look faded from adding color on top of them. I did notice some parts looked a little chalky on the lines where restamping the image would have fixed that.

Now it's your turn! Comment below with your images colored with watercolor pencils! Download the PDF below.
Thanks for stopping by! Happy crafting :)
Pam
reference: Card to Canvas: Mixed-media techniques for paper crafts by Colleen Schaan.


Comments